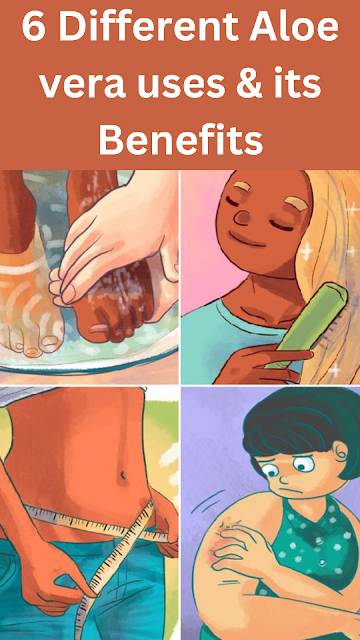
6 different Aloe vera uses & its benefits


 6 different Aloe vera uses & its benefits

Aloe vera can be used in multiple ways: from treating the wounds to improving the skin. The anti-inflammatory, anti-bacterial and antioxidant properties of aloe vera helps in preventing acne and wrinkles and make your skin look young and healthy. There are multiple aloe vera uses and benefits for health and skin. Aloe vera can be one of the great natural ways to achieve a healthy glowing skin.

Here are six different ways we can use aloe vera on our skin to get that flawless look:

1. With Turmeric

Add a little amount of turmeric in the aloe vera gel and mix it properly. Apply it in your skin and leave it for 10 mins or rinse it when it dries out. The antibacterial property of turmeric kills the bacteria that cause irritation on the skin and prevents pimple and acne. And it adds more benefits when applied with aloe vera gel.

2. With Lemon

Take some aloe vera gel in a bowl and squeeze three to four drops of fresh lemon juice in it. Now apply that mixture on your skin and leave it for 10 mins. You can also apply the mixture with a cotton facial sheet mask. It will help in cleansing your skin and prevents acne.

3. With Rice flour

Cut the aloe vera into two slices. Take some rice flour in one slice and rub it in your skin. Rinse after you are done massaging. It helps in exfoliating your skin and removing blackheads too.

4. With Rose water

Take some aloe vera gel in a bowl. Add some rose water in it. Mix them properly. Then apply the mixture with a clean makeup brush. Leave the mixture to dry on your skin. It helps in minimizing the pores and gives you a fresh look every time you apply it.

5. Aloe vera juice

When you eat healthily, you look beautiful. So it’s more important to choose the right food that helps you get the glowing skin. And here aloe vera juice works very effectively. Drink 25 ml of aloe vera juice with the same amount of water. Drink daily to get effective results.

6.Aloe vera 

No lemon, no rose water, you don’t have to mix anything. Aloe vera alone can do a lot. Gently massage aloe vera gel on your skin for 5 min and leave it for 15 mins until you feel it dry. Then rinse your face with cold water. It cleanses your skin and the vitamins enriched aloe vera help reduces acne and pimples. It also moisturizes your skin.

Conclusion

These simple hacks are going to do magic on your skin. There are many many aloe vera uses and benefits that we cannot even count on our fingers. Skin related problems like acne, oily as well as dry skin, pimples, and pigmentations will vanish and you are going to have that goddess skin.

Best Rice flour face mask for glass skin


Best Rice flour face mask for glass skin


Clear, smooth, healthy, and glowing skin with fewer flaws but more beauty is everyone’s dream. But it’s not easy to achieve one, and it’s tougher during winter. The only thing I can think of now is the poem below. 

So why wait? We are going to show you the best face mask that has multiple benefits. This rice flour face mask is best to achieve a glowing glass skin. Rice has many skin benefits and works great for anti-ageing.

How to make Rice Flour face mask:

Ingredients needed:

  • 2 tbsps of rice flour
  • 1 tbsp of yoghurt
  • 1/2 tbsp of honey
  • 1/2 tbsp of aloe vera gel
  • 1 tsp of turmeric powder
  • 1 Vit E capsule

Proces to make rice flour face mask:

  1. Take rice flour in a clean bowl.
  2. Add yoghurt, honey, aloe vera gel and turmeric powder.
  3. Mix them and stir thoroughly to prevent any lumps. 
  4. Add water or milk to get your desired consistency (optional).
  5. Add the Vit E oil in the mixture and mix the ingredients.
  6. The face mask is ready. Apply it all over your face and neck. 
  7. Leave it for 20-30 minutes.
  8. Rinse thoroughly with lukewarm water.

Benefits:

  • glass skin
  • natural moisturizer
  • fights acne and pimple
  • hydrates skin
  • removes blackheads
  • removes tan 
  • prevents early signs of ageing
  • treats dull and dry skin
  • removes dark spots

Conclusion

This face mask is one of our favourite, which has all the benefits from tan removal to dark spots removal. This face mask is the beauty treatment we all need.
My favourite and one day, it’s going to be yours too. Try this amazing face mask and comment down below if you are going to try it.

How to Remove Unwanted Hair from Your Upper Lip Naturally


 How to Remove Unwanted Hair from Your Upper Lip Naturally


If you want to remove unwanted hair from your upper lip naturally, there are a few methods you can try. Here are some options:

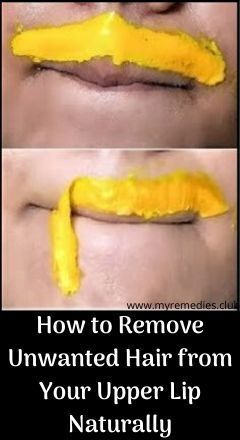
  1. Turmeric and Milk Paste:

    • Mix equal parts of turmeric powder and milk to create a thick paste.
    • Apply the paste to your upper lip area and let it dry for about 15-20 minutes.
    • Once dry, gently rub the paste off in the opposite direction of hair growth.
    • Rinse your face with water and pat it dry. Repeat this process regularly for best results.
  2. Sugar and Lemon Juice Wax:

    • Mix 2 tablespoons of sugar, 1 tablespoon of lemon juice, and 1 tablespoon of water in a microwave-safe bowl.
    • Heat the mixture in the microwave for about 2 minutes until it turns into a thick, sticky wax-like consistency.
    • Allow the mixture to cool down a bit and then apply it to your upper lip using a spatula or your fingers.
    • Place a cloth strip or waxing strip over the wax and press it down firmly.
    • Hold your skin taut and quickly pull the strip off in the opposite direction of hair growth.
    • Rinse your face with water and apply a soothing moisturizer afterward.
  3. Egg White Mask:

    • Separate the egg white from an egg and beat it until it becomes frothy.
    • Apply a thin layer of the beaten egg white to your upper lip using a brush or your fingers.
    • Place a thin tissue or paper towel over the egg white and press it down gently.
    • Allow the mask to dry completely, and then peel it off in one swift motion.
    • Rinse your face with water and apply a moisturizer.
  4. Gram Flour and Yogurt Mask:

    • Mix 2 tablespoons of gram flour (also known as chickpea flour) with enough yogurt to form a paste.
    • Add a pinch of turmeric powder to the mixture and mix well.
    • Apply the paste to your upper lip and let it dry for about 15-20 minutes.
    • Once dry, gently scrub the paste off in the opposite direction of hair growth.
    • Rinse your face with water and moisturize afterward.

Remember to do a patch test on a small area of your skin before applying these remedies to ensure you don't have any adverse reactions. Additionally, these methods may not provide permanent hair removal and may need to be repeated regularly for maintenance. If you're looking for a more permanent solution, you may want to consider professional hair removal methods like laser hair removal or electrolysis.

"Blast Away Belly Fat: Effective Exercises for a Toned Core"


 "Blast Away Belly Fat: Effective Exercises for a Toned Core"


When it comes to targeting the belly area, it's important to remember that spot reduction is not possible. However, engaging in regular exercises that target the core can help strengthen and tone the abdominal muscles. Here are a few effective belly exercises:

  1. Crunches: Lie on your back with your knees bent and feet flat on the floor. Place your hands behind your head, contract your abdominal muscles, and lift your upper body off the ground. Lower back down and repeat for a desired number of repetitions.

  2. Plank: Get into a push-up position with your hands directly under your shoulders and your toes on the floor. Engage your core muscles, keeping your body in a straight line from head to toe. Hold this position for as long as you can while maintaining good form.

  3. Russian Twists: Sit on the floor with your knees bent and feet flat on the ground. Lean back slightly, keeping your back straight. Clasp your hands together in front of your chest and twist your torso to one side, then to the other, while keeping your core engaged.

  4. Bicycle Crunches: Lie on your back with your hands behind your head and your legs lifted off the ground, knees bent. Bring one knee toward your chest while simultaneously twisting your torso to bring your opposite elbow towards the knee. Repeat on the other side, alternating in a cycling motion.

  5. Mountain Climbers: Start in a push-up position with your hands directly under your shoulders. Alternately bring one knee towards your chest and then extend it back, while quickly switching to the other knee. Maintain a steady pace and engage your core throughout.

Remember to combine these exercises with a balanced diet and regular cardio workouts to help reduce overall body fat, including belly fat. It's always a good idea to consult with a fitness professional or healthcare provider before starting a new exercise routine.


Super Easy Workout with a Chair | Beginners Chair Cardio Workout


Super Easy Workout with a Chair | Beginners Chair Cardio Workout


If you're looking for a super easy workout that you can do at home with just a chair, here's a quick routine to get you started:

  1. Chair Squats: Stand in front of the chair with your feet shoulder-width apart. Lower your body into a sitting position, keeping your weight in your heels, and then stand back up. Repeat for 10-15 reps.

  2. Chair Dips: Sit on the edge of the chair and place your hands on the seat, fingers pointing forward. Slide your bottom off the chair, keeping your legs extended. Lower your body by bending your elbows and then push back up. Aim for 10-15 reps.

  3. Chair Step-Ups: Stand facing the chair. Step one foot onto the seat, pushing through your heel to lift your body up onto the chair. Step back down and repeat with the other foot. Do 10-15 step-ups on each leg.

  4. Chair Planks: Place your hands on the seat of the chair and step your feet back into a plank position, with your body in a straight line. Hold this position for 30 seconds to 1 minute, focusing on engaging your core muscles.

  5. Chair Leg Raises: Sit on the edge of the chair and hold onto the sides for support. Lift both legs off the ground, keeping them straight, and hold for a few seconds before lowering them back down. Repeat for 10-15 reps.

Remember to warm up before starting the workout and cool down afterward. Listen to your body and modify the exercises as needed. This simple chair workout is a great way to engage your muscles and get moving, even in a small space.


Lower Belly Workout To Lose Fat In A Week


 Lower Belly Workout To Lose Fat In A Week

It's important to note that losing fat in a specific area within a week is not realistic or healthy. However, incorporating targeted exercises into your overall fitness routine can help tone and strengthen your lower belly over time. Here's a sample lower belly workout that you can include in your fitness regimen:

  1. Reverse Crunches: Lie on your back with your legs bent and lifted off the ground. Bring your knees towards your chest, lifting your hips off the ground, and then slowly lower them back down. Aim for 3 sets of 15-20 repetitions.

  2. Plank: Get into a plank position with your forearms on the ground, elbows under your shoulders, and toes on the floor. Keep your body in a straight line, engaging your core. Hold the position for 30-60 seconds, or as long as you can maintain good form. Repeat for 3 sets.

  3. Bicycle Crunches: Lie on your back with your hands behind your head and legs lifted off the ground. Bring your right elbow towards your left knee while straightening your right leg, and then switch sides. Continue alternating in a pedaling motion for 3 sets of 15-20 repetitions.

  4. Mountain Climbers: Start in a high plank position with your hands directly under your shoulders. Alternate bringing your knees towards your chest in a running motion while keeping your core engaged. Aim for 3 sets of 20-30 seconds.

  5. Leg Raises: Lie on your back with your legs extended. Lift your legs off the ground, keeping them straight, until they are perpendicular to the floor. Slowly lower them back down without touching the ground. Perform 3 sets of 12-15 repetitions.

Remember, losing belly fat requires a combination of regular exercise, a balanced diet, and a healthy lifestyle. Consistency and patience are key when it comes to achieving long-term results. Consult with a fitness professional or healthcare provider for personalized advice and guidance.


Homemade Detox Mask For Acne | Homemade Acne Mask For Clear Skin


 Homemade Detox Mask For Acne | Homemade Acne Mask For Clear Skin

 I’ve been a on a natural kick lately (super paranoid of the ingredients in mass produced products), and have recently discovered all of the natural benefits of Indian Healing Clay. I’ve found that making your own homemade products is a lot easier than I could have ever imagined, and most of them only require a few ingredients, minus all of the preservatives and unnecessary additives.

This easy DIY homemade mask has become one of my favorite skin care routines because it’s super easy and ACTUALLY effective! If you suffer from acne, large pores, black heads or simply just want to soften your skin like never before, you’ve got to try this mask.

I love the way it feels on my face when it dries because it pulls it super tight and then feels so clean afterwards. It makes me feel like I just got home from the spa!

Indian Healing Clay Mask

Homemade Acne Mask For Clear Skin

INGREDIENTS:

INSTRUCTIONS:

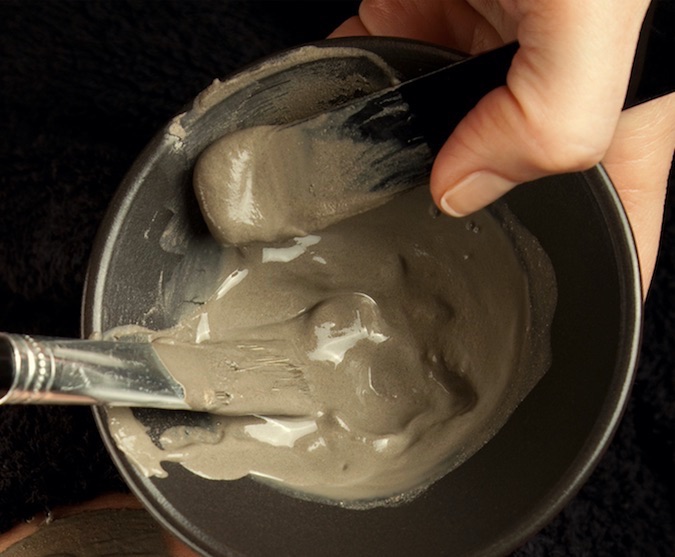
    1. In a plastic or disposable container, mix equal parts of the two ingredients together until you get a smooth, thick, cream-like texture. I just eyeball it, so the measurements are not exact. Start with the clay, and then keep adding the apple cider vinegar until you get the right consistency. You really don’t need much to make one application.
    2. Apply a thin layer to your face, neck and/or chest and leave it on for 15-30 minutes. You will feel it pulling your skin super tight! Don’t get it too close to your eyes or the apple cider vinegar will make them burn a little. Rinse off with warm water.

TIPS:

  • Indian healing clay is a bentonite clay that has many health and beauty benefits. It combats so many skin conditions including acne, blackheads, large pores, fine lines, and dull skin. But, it’s mostly known as a detox that naturally pulls impurities and toxins from your skin. You can read reviews here.
  • You can make make a batch of this for future use, but it will expire after a week. I’ve made a large batch of this before, only to go back to it a few weeks later to find mold growing inside. Don’t make more than you will use in a week at one time.